Thursday, February 11, 2016

Celebrate President's Day with Google Drawings

President's Day is just around the corner. This is a perfect time to introduce students to those who have shaped our nation. It is also a great way to transition to talking to your students about their futures, their dreams, and what they might do if they were President of the United States.

In comes Google Drawings! With Google Drawings, students have a place to write about what they would do if they were president or better yet, they could draw what their first actions would be if elected president.

Check out this If I Were President Template I created in Google Drawings. You can make a copy of it and use it in the classroom with your students.

You might even start out this activity with a discussion about what a president's job entails. However, encourage your students to be creative and come up with ideas for what they want their world to be like. Then have students explain their drawings.

If you want to share all the drawings in one place for the entire class to see, try creating a collaborative Padlet. Students can save their drawings as JPEGs and upload them to the padlet.

Happy President's Day!

Wednesday, January 27, 2016

Badges for Professional Learning

At the recent TCEA Campus Technology Specialist Academy, I presented on “Promoting Technology Use on Your Campus.” During the presentation, I mentioned rewarding teachers who come to training by giving them a badge. The technology team at Lubbock ISD immediately stated, “Rewarding our staff with badges for completing staff development has really motivated them.” Focusing on positive motivation rather than a fear of negative consequences can really make a difference.
If you are looking for ways to motivate teachers to attend professional development, try incorporating badges. Below are a few resources for creating badges.
Badge Resources
  1. Class Badges Class Badges is one of the more popular badging platforms. Class badges allow the teacher to easily award badges aligned with learning goals.
  2. CredlyCredly allows teachers to create badges, upload their own designs, and give credit through the platform. It is available as a web-based version and an iOS app.
  3. Create a Badge with Google Drawing– If you have ever thought of creating your own badges, Google Drawing is a great tool to use. Read Alice Keeler’s blog entry on how easy it is to do.
  4. For All Badges For All Badges is an iOS app that works in conjunction with For All Rubrics to align your rubrics with badges. For All Badges also integrates with Mozilla’s Open Badges platform, and allows students (or staff members) to save badges to their “backpack.”
  5. Open Badges Open Badges allows teachers to create and issue badges that do not have to be tied to a certain platform. Take the Badges 101 Quiz to see how it works and to earn your first badge.
With badges, teachers who take the time to learn now have a way to be acknowledged for that learning. And we all know that recognition from our peers is the sweetest reward. Encourage them to include their badges in their email signature or print and post them in their classroom. You can even publicly honor them by “presenting” the badges at a faculty meeting.
Here is Lubbock ISD’s Digital Learning Badge site, a great resource. If you are incorporating badges into your professional development, I’d love to hear from you. Please let me know in the comment section below.

Friday, January 22, 2016

5 Fabulous Formative Assessments For Your Classroom


Teachers are constantly engaged in the process of formative assessment. Without the regular use of formative assessment, or checks for understanding, how are teachers to know what each student needs to be successful in the classroom? Teachers have many strategies and tools from which to choose. Learn about a few below.

Exit Tickets – Exit tickets can be a great way to set up the next day's learning.Before students leave class, they can be asked for an “exit ticket” that provides insight into what they learned from the day’s activities. For a digital exit ticket, try creating a Google Form that asks students about their thoughts on a lesson or have students create a short, three-panel comic strip outlining the day’s most valuable key idea.

Graphic Organizers – Graphic organizers can be used to assess prior knowledge, record learning during a lecture or class reading, or organize knowledge after learning. Some examples include Venn diagrams, word/idea webs or concept maps. Google Drawing, Gliffy, Bubbl.us, and Mindmeister are always great options for creating digital graphic organizers. For word clouds, try Wordle, WordIt Out or Word Mosaic.

Quick Write – With quick writes, you can ask student to respond to an open-ended question or prompt. This can be done before, during, or after the lesson. Some useful tools for this include Chatzy, Today’s Meet, and Padlet.  A few others to check out are Active Prompt and Lino. Don’t forget to remind students to share something unique and not repeat a classmate’s answer.

Quizzes Quizzes assess students for factual information and concepts. There is usually a single best answer and are great for on-the-fly assessment. Socrative can be used for quick quizzes as well as Kahoot, which lets you build fun into your quizzes.  Students can use computers, cell phones, or other devices to join in and answer the questions.

Recall – Recalling information allows students to list the most important concepts they learned or things that were meaningful to them. Try having students make a list – in words or simple phrases – and rank them in order of importance, like a Top Ten List. Try using List.ly or Listmoz to create digital lists.


Remember that the true value of doing formative assessments lies in what happens afterwards when you take the data and change your teaching strategies and processes to reflect what you’ve learned and to better serve each student.

Monday, January 18, 2016

Take Advantage of the Power of Google Forms for Perfect Rubrics

During a recent Google Educator Level I training, a participant asked, “Have you ever used a Google Form to create a rubric?” No one in the training, including myself, had ever used Google Forms this way.
We all agreed that rubrics are great for students. Rubrics clearly communicate what is expected of the student and they give students the opportunity to do a self-assessment to reflect on their learning process. In the past, I’ve had students evaluate their own and their peers’ performance using rubrics. What I particularly like about using rubrics is that they can be customized to suit any classroom activity. Had I created my rubrics in Google Forms, my life would have been so much easier.
Below are a few ways to create rubrics in Google Forms.


Use Grid-Type Questions

Using grids is typically how most rubrics are set up. When the user completes this type of rubric, he will be presented with a grid of rows and columns and will need to click a single cell to place his response for each row.
To create a grid-type rubric:
  1. Create a Google Form and enter a title.
  2. Type in your overall question, directions, or topic that will apply to each question in the grid (for example, Presentation Rubric).
  3. Then select the grid-type question.
  4. For the columns, enter your rubric scale. For example, 4 = Excellent.
  5. For the rows, enter your rubric criteria. For example, Student presents information in logical sequence.
  6. Once you click Done, you can preview your form.
Click here to see my rubric using a grid-type question.


Use Scale-Type Questions

Using scales in another way to set up your rubric. When the user completes this type of rubric, he will be presented with a scale of values on which to place his response.
To create a scale-type rubric:
  1. Create a Google Form and enter a title.
  2. Type in your overall question, criteria, or topic that will apply to the scale (for example, Organization).
  3. Enter help text, if needed, to help identify point values of the scale.
  4. Then select the scale-type question.
  5. Add your scale by entering a starting point (0 or 1) and an ending point (up to 10) for your scale.
  6. Next, add values for the starting point, such as Disorganized and add values for the ending point, such as Very Organized.
  7. Once you click Done, you can preview your form.
Click here to see my rubric using scale-type questions.


Other Items to Add to Your Form

Some other helpful items to add to your form at the beginning include:
  1. The name of the evaluator
  2. The class period
  3. A unique identifier (a code or number assigned to the student who is being evaluated)
Make these required questions by checking the box at the bottom of the question. That way, these questions won’t accidently be skipped.


Collecting Responses

As you most likely know, one of the beautiful features of Google Forms is that it automatically collects responses in a Google Sheet. Once all responses have been collected, you can then add formulas and sort the data in order to analyze it.
Now’s the time to stop using paper rubrics, like I once did. Try re-creating them in Google Forms. If you are already creating rubrics in Google Forms, I’d love to hear from you. Share your examples with me at diana.benner@gmail.com.

Sunday, October 25, 2015

BYOD Tools for the Mobile Classroom

As mobile device use in education explodes, it’s no surprise that BYOD (Bring Your Own Device or sometimes Bring Your Own Technology) is a topic that many educators are talking about. However, it takes more than devices for a BYOD implementation to be successful. Interactive and collaborative tools are needed to keep students focused and on track. Here are a few tools that will help you as you begin to embrace mobile devices in the classroom.
  • Remind Voice Clips – With Voice Clips, add voice into your lessons by sending students short voice messages straight to their mobile devices. Students can listen to your message instantly through Remind regardless of their mobile device. You can also record questions on Voice Clips to improve oral comprehension or record students’ voices to practice speaking and reading skills.
  • Dropbox – With Dropbox, files can easily be shared across devices. Dropbox provides syncing and storage for users with up to 2 gigabytes of free storage space. It’s enough to store hundreds of homework assignment and pictures. Files can be shared with a few clicks, which makes collaboration easy. Dropbox does require an email account to register.
  • Google Keep – With Google Keep, students can take notes and gather resources for their projects. It is great for capturing what is on your students’ minds. Reminders about homework and quizzes can be sent, as well as voice notes. It’s free and can even be used offline.
  • Poll Everywhere – With Poll Everywhere, you can easily poll your students in order to gather informal assessment data. It’s a great way to gauge if your students are mastering topics so that you can move forward with the next lesson. Students can respond via text from their smartphone or computer browser. The teacher must create a free account.
  • MentorMob – With MentorMob, otherwise known as LessonPaths, you can easily share web links with your students. MentorMob is a free content curation tool that allows you to create learning playlists that can easily be shared with students.
  • If you need more BYOD tools, be sure to take a look at this list of 51 resources.
 
What tools do you use in your BYOD classroom?

Thursday, September 10, 2015

Apple's Special Event


Apple finally revealed what Siri wouldn’t give us a hint about. Here’s a quick recap of everything you need to know from the keynote.

iPad Pro


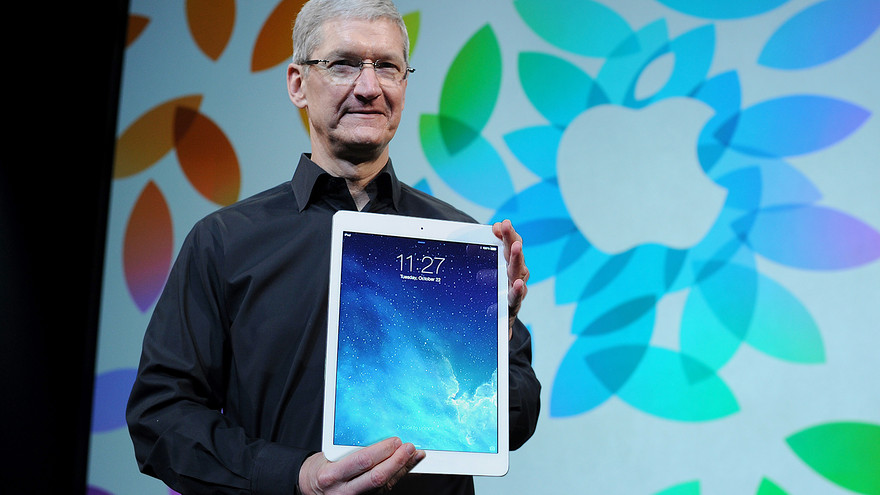
After more than a year of rumors, a jumbo-sized iPad has landed! The new iPad Pro brings a slightly larger screen at 12.9 inches, roughly the size of a 13-inch MacBook. The device is powered by a new A9X processor that is 1.8 times faster than Apple’s previous generation chip. It has a four-speaker stereo sound system and is just 6.9mm thick. Best of all, the tablet will last for 10 hours of usage on a single charge.
Image Source: : http://goo.gl/nkMbTF


The device was designed to take advantage of the new multitasking features that Apple added to iOS 9 to make it more useful for productivity. Apple’s Phil Schiller said that the iPad Pro offered “desktop-class” performance and that it would enable new types of applications never seen on any previous iPad.


In an unexpected twist, a representative from Microsoft came out on stage to show off a new version of its iconic Office software designed specifically for the new iPad. Microsoft showed off the “multitasking” found in the iPad which allows you to work on two documents at once.


Pricing for the iPad Pro will start at $799 for a 32GB model, $949 for a 128GB model and $1,079 for a 128GB model with LTE connectivity. It will be available sometime in November.


Smart Keyboard

Apple unveiled a brand new keyboard accessory designed specifically for the iPad Pro. It’s basically a cover and keyboard in one. It magnetically connects with a three-port Smart Connector to accommodate landscape typing. The Smart Keyboard will cost $169 and will be available sometime in November.


Apple Pencil

Image Source: http://goo.gl/ADxGzc
In addition to the keyboard, the iPad Pro will also be supported by the new Apple Pencil, which is basically a sleek stylus that is precise and supports force data. Pressing lightly will result in a thin stroke, while a firm press will produce a broader stroke. The Pencil features a Lightning connector that lets you recharge it while hooked up to the tablet. When using the pencil, multiple scans allow for capturing more points in a stroke. The pencil can be used to mark up emails, images and others items directly via select iOS apps. The Apple Pencil will cost $99 and will be available sometime in November.


iPad Mini 4

The iPad Mini 4 will be a slightly thinner version of the third-generation iPad Mini. It contains a faster processor, and it also has a better camera than the iPad Mini 3. The new iPad mini 4, says Apple, packs "the power and performance of the iPad Air 2" into a smaller mini enclosure, which now weighs just 0.65 pounds. Make note that the faster processor and more RAM in the iPad Mini 4 means that it will support “split-screen” apps, which will debut in iOS 9. The iPad Mini 4 will start at $399 for 16GB and is currently available.


iPhone 6S and iPhone 6S Plus

The iPhone 6s and iPhone 6S Plus look practically identical to the current iPhone 6 and iPhone 6 Plus. However, internally they are different. Highlights include Apple’s new 3D Touch technology, faster processors, twice the RAM as last year’s iPhones, new 12-megapixel rear cameras and 5-megapixel front cameras, Live Photos, and a new color option.


  • 3D Touch - Apple has included a variation of Force Touch, called 3D Touch, on the newer versions of the phones, which will call up secondary menus and actions when you press and hold the screen. For example, if you're in your email inbox, applying fingertip pressure to an element in the message will surface more information, like maybe the flight number on an emailed travel itinerary, for instance. Apple called this concept "peeking in" during the live demo.
Image Source: http://goo.gl/sQoA3F

  • Better Cameras - Apple’s new rear camera on the iPhone 6s and iPhone 6s Plus is 12-megapixels. The new phones feature better optics and it can record 4K video as well. The front-facing camera has been upped to 5 megapixels, and it supports full HD video as well as selfie panoramas. Both new cameras include a new software-based flash feature that should improve low-light photography.

  • Live Photos - When the iPhone 6s captures a standard photo, it also records a brief video automatically in the background. Simply force touch on any photo in your camera roll and you’ll see the brief animation play.

  • A New Color - The iPhones will now come in a new color, called rose gold. It basically looks like a blush pink, same as the new Apple Watch color option.

  • Hey Siri - With a new setting enabled, Siri will always be listening for the “hey Siri” trigger, even when the iPhone’s display is off. Earlier iPhone models have a similar feature, but the phone needed to be plugged in for Siri to listen.


  • New Touch ID - The new iPhones will include a brand new Touch ID sensor that Apple says is twice as fast as the scanner in the iPhone 6.


Apple’s new iPhone 6s and iPhone 6s Plus will be available for preorder on September 12, with phone arriving in stores on September 25. On a two-year contract, the iPhone 6S starts at $199 for the 16GB model, and moves up to $299 for 64GB and $399 for 128GB. The iPhone 6S Plus 16GB model starts at $299, and costs $399 for 64GB and $499 for 128GB.


iPhone Upgrade Program

With Apple’s new iPhone upgrade program, you can now buy a new unlocked iPhone from Apple starting at $32 a month, and you’ll be able to trade it in next year and get the same tier iPhone at the same price with no lump payments.


Apple TV

The next-generation Apple TV will ship with a completely redesigned remote with touch controls and sensors that allow for motion controls. It’s powered by the 64-bit A8 chip and it’s the same size as the old Apple TV. The highlight is the fact that Apple is opening its TV platform up to third-party app and game developers with the new tvOS platform.

The remote is also a big component of the new Apple TV, featuring a menu button, a TV button, a Siri button and more. But the key feature is the glass touch surface, giving users the ability to scroll through a menu without having to tap or hold down any buttons. You can click and swipe to fast forward or rewind through shows as well.

Siri can be used to control Apple TV now as well, allowing users to ask Siri to find whatever they’re in the mood for, be it a new movie, a great game or live sports. You can also ask Siri about movies and TV shows (or basically anything you can think of) while you’re watching. Siri will show an update at the bottom of the screen without interrupting the show or movie.

The new Apple TV will be available in October at $149 with 32GB of storage and $199 with 64GB of storage.


Apple Watch
Image Source: http://goo.gl/ZDcmtF

Apple announced new own-brand bands for the watch, new fashion partnerships for third-party bands, new Apple Sport colors, and it also shared details surrounding WatchOS 2’s upcoming release.

According to Tim Cook, the Watch has a 97% satisfaction rate so far. Examples of new apps coming to the watch include Facebook Messenger and an app that lets you control your GoPro camera from your wrist.

Beyond software, Apple announced a partnership with Hermes to bring a whole new range of bands to the Apple Watch. Bands will become available in select stores starting next month.

The company also announced two new colors for the aluminum Apple Watch Sport: gold and rose gold. Both new colors are available beginning today. There will also be new bands that accompany the new colors, and the Stainless Apple Watch will get a few new bands as well. Lastly, there will be a whole new range of Sport bands in fall colors, and WatchOS 2 will be released on September 16. 

iOS 9

Apple's new operating system, iOS 9 will include split-screen apps, a smarter Siri, content blockers for Safari and more. It will be released to the general public on September 16.