Showing posts with label video. Show all posts

Friday, September 27, 2019

Reel into Paper Slide Videos

Paper slides are a powerful yet simple, low-tech way to integrate video into your classroom. Just like the name implies, it involves the sliding of papers to create a movie. Students create paper slides on good old white paper. Then they slide them across while someone videos it. It is definitely an engaging way to have students demonstrate their knowledge in any subject area and any grade level. In addition, you are emphasizing important skills such as communication, collaboration, critical thinking, and creativity.

Materials Needed
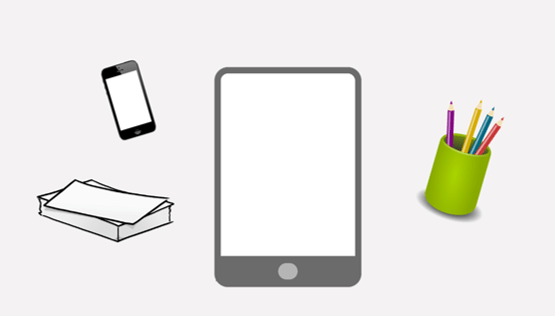
The great thing about paper slides is that you don’t need a lot of materials. All you need is:
  1. Blank white paper
  2. Crayons or markers
  3. A device that can record video (like a cell phone)

Classroom Ideas

While the possibilities for using paper slide videos in the classroom are endless, below are few ideas to help you get started:
  • Reading – Students break down the elements of a story, for example character, setting, conflict, plot, and theme.
  • Math – Students show each step in an equation or problem while they explain it.
  • Science – Students show different parts of a cell or stages of the water cycle.
  • Writing- Students show each stage in their writing process to show how they brainstormed, drafted, revised, edited, and published a piece.
  • Social Studies – Students create a timeline of a historical event or create political cartoons.
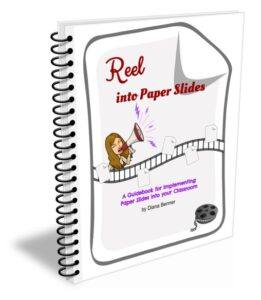
paper slide videoseBook

For more classroom ideas and best practices for implementation, download the Reel into Paper Slides eBook. You will even find a concept map to help with brainstorming and a grading rubric you can use to clarify expectations. Download it now!
And, if you want to see some examples created by teachers, you can check them out here.

Monday, October 1, 2018

Four Google Slides Tips for Amazing Presentations

Google Slides is one of the best presentation tools that I have used. It has come a long way from when it first came out because Google continues to add updated features to it. While the collaborative features of allowing multiple editors to work on a presentation together is great, there is so much more you can do with Google Slides. The four important tips below will enable you to tap into the potential of Google Slides while also allowing you to create engaging presentations that will amaze your audience.


Tip #1: Use a Template as Your Starting Point

tips

If you want to get your message across, you must first be able to captivate your audience. Part of that captivation is realizing that we are all visual beings; therefore, an effective presentation design is as important as the message itself. If you are stuck trying to come up with a creative look for your slideshow, then enlist the help of slide templates.  Templates can serve as your starting point or as an inspiration for what you want to create yourself. 


Tip #2: Insert Videos Directly into Your Google Slideshow

There’s a lot to be said for having videos in your slideshows. It can keep presentations interesting, offer additional learning experiences, and give your voice a break. You can insert videos into Google Slides two different ways: through YouTube or through your Google Drive.
tips

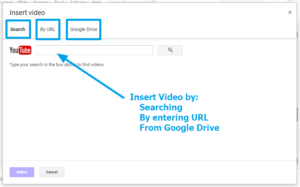
To insert a video, make sure that you have the YouTube URL or that it is already uploaded to your Google Drive. Then navigate to the Insert menu and select Video. A box will open with separate tabs to “search” YouTube, link directly through a YouTube URL, or navigate your Google Drive files. Simply enter the URL or select the file you want to link to your slideshow, and then press Select to insert it into your slide.

To see how to enhance your presentation with more than just video, read the Fabulous Presentations with Google Slides blog.


Tip #3: Use Slides Q&A to Interact with Your Audience

tips

While presenting, allow your audience to ask questions through Slides Q&A. Being interrupted to answer questions while you are presenting can make you, the presenter, lose your train of thought. Thankfully, Slides Q&A offers a great solution to that.

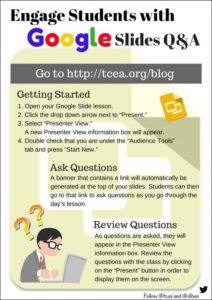
With the Slide Q&A feature, your audience can submit questions using a specific link you give them. The questions will be visible to both you and the audience. The audience can vote up questions that they are interested in, ensuring that you answer higher priority questions first. By simply submitting questions from any device, your audience will be more involved in the presentation. Furthermore, they will feel like they are getting real-time feedback.

The Q&A feature is accessible through the Presenter View. To see how to get started using this wonderful feature, read the Engage Students with Google Slides Q&A blog.

tips


Tip #4: Present with Your Phone

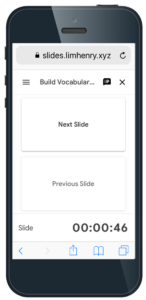
Thanks to the Remote for Slides Chrome extension, you don’t have to buy a presentation clicker. In addition, you don’t have to be tethered to your laptop while you present. The extension works in collaboration with your Google Slide presentation so you can walk around the room with your phone and still advance your slides. If you included talking points in the slide notes section, you can view these on your phone as well. Another thing to note is that a timer is also available to help you keep track of time. For step-by-step instructions on how to use the Remote for Slides Chrome extension, check out the Use Your Phone as a Google Slide Presentation Remote blog.


Ready to Present?

If you have an upcoming presentation, try some of the tips mentioned above to take your presentation to the next level. Your presentations will surely catch the eye of every audience member!